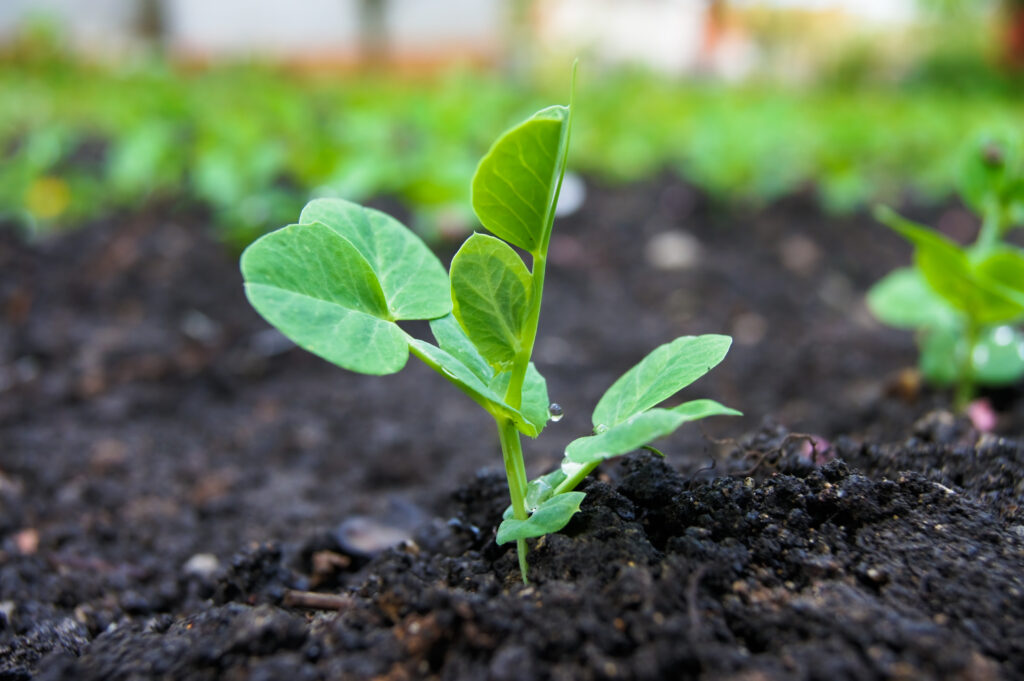
Today I brought my pea gutters to the allotment (having kittens every time I braked worrying they’d flop out all over the boot). I’d already topped up the bed with fresh compost gathered when I refreshed my woodchip paths (really nice stuff – the weeds thought so too). I have used the gutter trick before and it worked out well. However, last time I was too skimpy on the water and let them get far too dry, so I was careful to avoid that this time around.
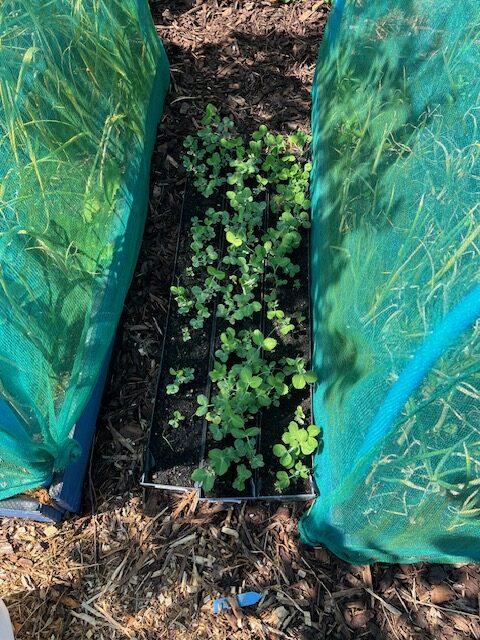
I germinated my peas in damp kitchen towel in plastic takeaway cartons. I’ve never had much luck with peas sowing direct or even in seed cells. Once they sprouted, I filled the guttering with multipurpose compost and transferred the germinated peas, planting them in diagonal rows of 3 around 3cm apart. That way, 40 pea seeds fit into a 1 metre length of guttering perfectly.
The pea seedlings were in my greenhouse for a couple of weeks, growing on, watered daily and well cared for. They didn’t seem very happy towards the end though. Some were turning yellow. I figured it was the heat, since the temperature was bouncing from 6 degrees at night to 39 degrees during the day. I moved them outside and they seemed to get on better.
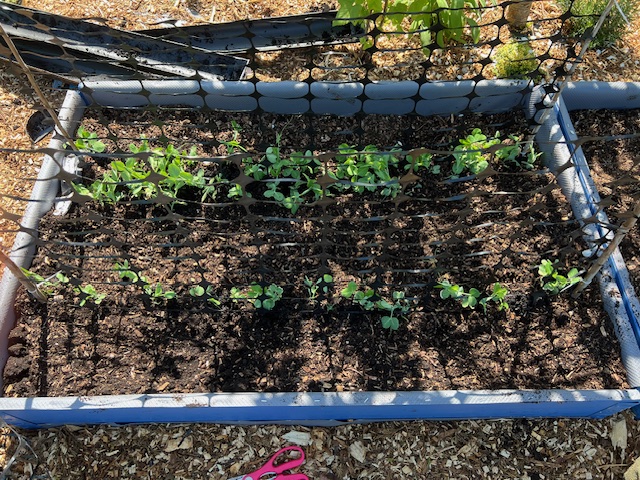
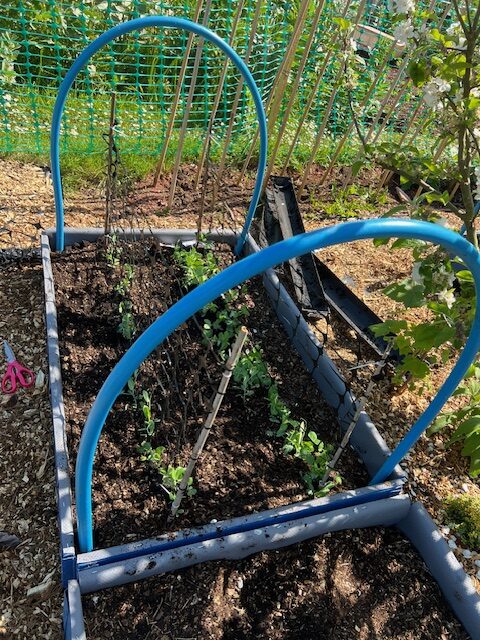
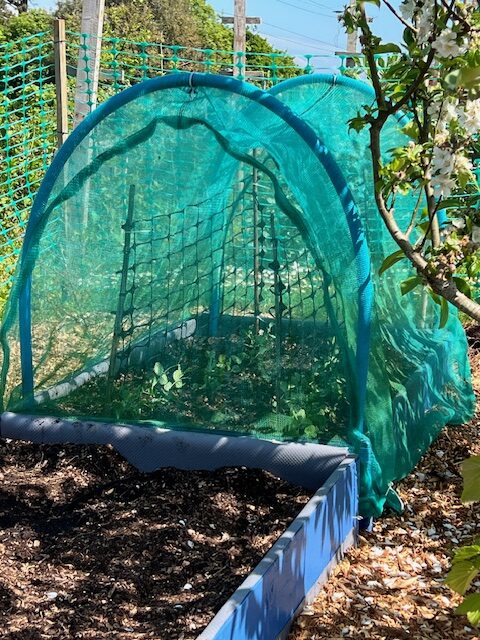
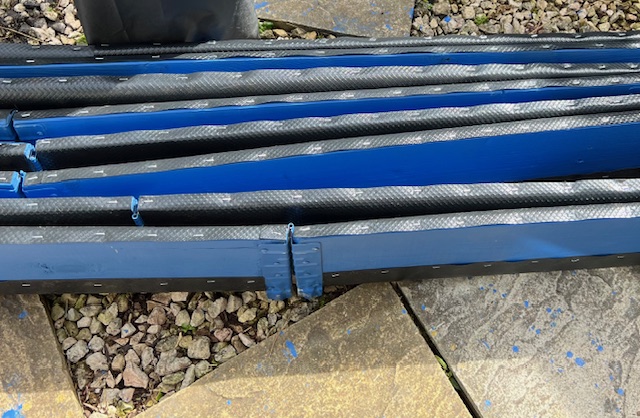
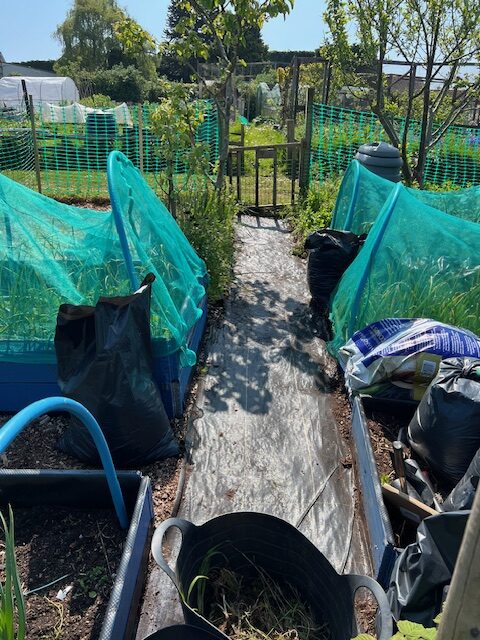
To prepare the raised bed, I pushed two bamboo canes into the compost, feeding into holes I’d already created hammering rebars in so the canes would be nice and stable. I’d already added a bit of lime and some chicken manure pellets. I then cut sheets of builder’s barrier fencing I had left over, feeding them through the bamboo canes then securing with cable ties. I’ve tried cheap pea netting before and found it an absolute nightmare: just a big plastic tangle. This was so much easier to work with and should do the job just fine. I added two rows of support to the raised bed.
I then placed one rebar at each corner of the raised bed and fitted blue tube hoops to support my nets. I knocked together the nets on my sewing machine a few years ago, making them to measure so I don’t have to mess around with loose netting. They’re made from debris netting and have stood up really well. I take them home and throw them in the washing machine every once in a while.
After digging a trench for my peas to slide into, I lifted the end of the tray of guttering, anxiously awaiting the magic moment as gravity took over and my pea shoots slid smoothly into the gap, slick as butter. It worked perfectly last time and was so rewarding to watch. This time, not so much.
I soon came to understand where I’d gone wrong. The compost was far too wet. No wonder they didn’t look happy. I was expecting a seamless transfer but it was all just a soggy composty mess, trying to transfer the clods bit by bit without damaging the plants too much. It was a bit like an episode of Bake Off where the chef is oh-so-smug, proudly turning out their Victoria sponge, only for it to do a belly flop. I planted one row each side of the support. I say planted, I mean manhandled and hoped for the best.
I have some more pea seeds on top of the fridge at home germinating (hopefully…). Last time I grew peas I quickly came to see the need for repeat sowing. One minute the plants are producing happily, the next, they’re spent.
I will be using guttering trick again, but I’ll be a lot less liberal with the water next time.
Many parents enjoy spending time with the children at the allotment, teaching them all about the growing process, an incredible journey that starts with a single seed. Others go to the allotment for some peace, regarding their allotment as an idyllic retreat to while away the hours in quiet solitude.
Growing fruit and vegetables helps children to understand more about the food that they eat, for example, that the origins of the humble chip actually go back a lot further than the supermarket freezer department. Experimenting with different crops encourages children to try new things, widening their palate and making them more likely to hit their five-a-day, potentially instilling lifelong healthy eating habits. Feeding children healthy, nutritious food is a priority for most parents and an allotment can ensure a year-round supply of extra fresh fruit and vegetables, but is one plot really enough?
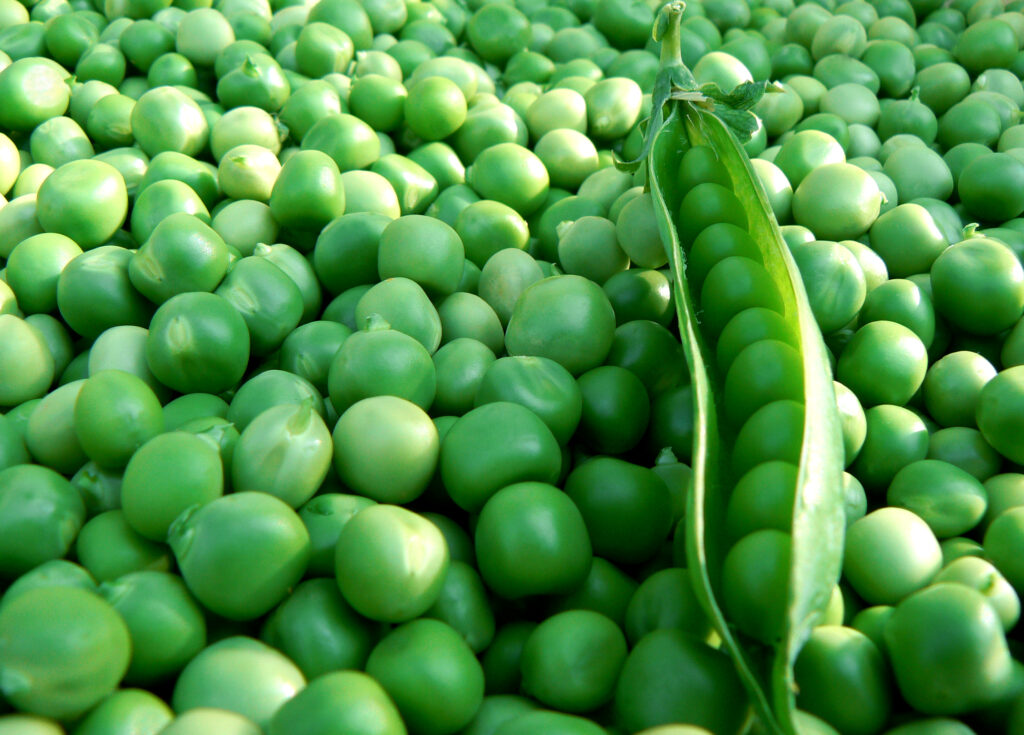
According to Research by John Jeavons and the Ecology Action Organisation, 370 square metres of growing space is enough to sustain one individual consuming a vegetarian diet for one year. With the average UK allotment spanning 250 square metres, in terms of feeding a family of four, one plot would fall woefully short in terms of providing sufficient potatoes or grain. Nevertheless, even the smallest area can be utilised to provide cost-effective, high-yield crops, with gluts frozen or preserved to see the family through the colder months, e.g. apples, rhubarb, raspberries, strawberries, peas and beans. In fact, legumes in particular offer an increased ROI for those with a small plot, providing impressive crops that grow vertically, maximising space efficiency.
In an article published by The Guardian, Jerry Coleby-Williams suggests that 400 square metres is adequate to feed a family of four year-round in subtropical Australia, where he lives. Having been taught by his grandparents, the English-Australian conservationist and gardener explains that the key to success is good soil, adding that it took five years for him to achieve this himself, but that with a 300 square meter garden, his three-person household produces more than enough food for themselves. Indeed, Mr Coleby-Williams reveals that by making marmalade the family have created a lucrative revenue stream, generating enough money to pay the mortgage for approximately six weeks.
One great thing about having an allotment is potential for cross-pollination, with fellow plot holders growing similar crops on site. Some trees, such as apple trees, pear and cherry trees, require another in the vicinity to produce a decent yield. The sharing of labour, knowledge and surplus crops can also be significant pluses. Indeed, if self-sufficiency is the goal, then establishing a cooperative of likeminded growers can go a long way towards achieving this, with gardeners sharing their gluts to support one another.
Where the goal is simply to supplement the family food supply, size isn’t everything. Even in a relatively small space, gardeners can supplement their family’s weekly shop with fresh fruit and vegetables year-round, growing produce with a flavour infinitely better than that found in the shops for just a fraction of the price. Growers also benefit from knowing exactly where their food has come from and how far it has travelled from field to plate.
There are few things as magical as springtime in the UK, daffodils and magnolia blossom reminding us that summertime won’t be far behind. With UK families feeling the pinch, many are rolling up their sleeves and having a go at growing their own. During a parliamentary debate on food security and supply chains at the height of the Covid-19 pandemic, Baroness Walmsley addressed a virtual House of Lords, insisting that the best way to ensure food security was for families to grow their own.
In reality, farming is highly skilled work that demands a significant investment of time, undertaking what is, at times, backbreaking work. To feed a family of four would be the equivalent of a full-time job, out in all weathers, with no guarantee of a decent crop at the end of the growing season. If it is too windy, too dry, too wet, too hot or too cold, crops will fail. A two-week holiday in Mallorca could trigger a drought from which many crops would struggle to recover. Becoming completely self-sufficient would require an inordinate commitment of time that is simply beyond most modern families. Neglect the plot for a week and menaces like couch grass and bind weed will set in, spreading from exposed areas to suffocate crops.
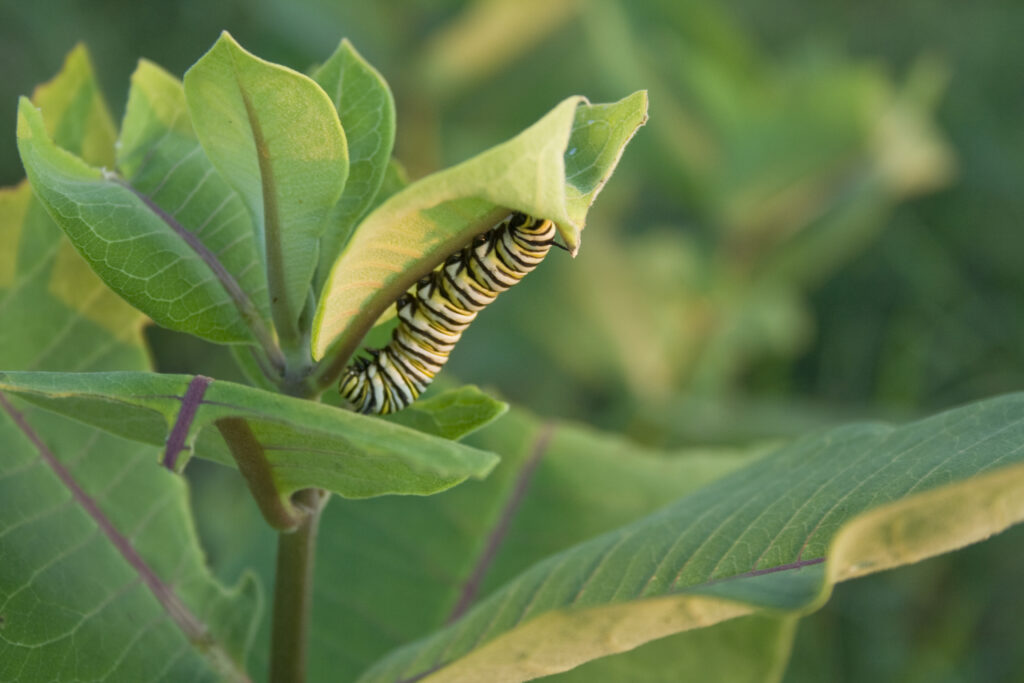
Then there are pests. Slugs, snails, mice, voles, rats, squirrels, birds, badgers, foxes, moles, caterpillars, wasps, ants, aphids, pear midge, coddling moths and carrot fly. The allotmenteer will wage war with them all in a seemingly never-ending battle. Baskets of produce will also need to be soaked and scrubbed to remove every last trace of this veritable smorgasbord of biodiversity.
However, having your own allotment presents a multitude of upsides too, enabling families to grow pretty much whatever they want, subject to the site rules. Alongside good old British stables like runner beans and rhubarb, many allotmenteers are becoming increasingly adventurous, growing produce that requires a hotter climate in line with the warmer and drier summers we are beginning to experience. Some allotments allow animals such as chickens and even sheep and goats to be raised on plots.
From an environmental perspective, allotments have an extremely positive impact, driving down growers’ carbon footprints by eliminating the need for packaging and the transportation of produce. Growing organically offers even greater environmental benefits, reducing levels of harmful chemicals in the soil and meaning that the produce picked has even greater health benefits.
One of the biggest incentives of taking on an allotment is the prospect of saving money on grocery bills. However, keeping a plot in good order can be a costly process, particularly at the beginning. On top of annual rent, which can be anywhere between £10 and £150 upwards per annum, allotmenteers must invest in tools, seeds, plants, and essentials like string, gardening gloves and bamboo canes. They will also need to think about landscaping, particularly if the plot they are taking on has been neglected, creating paths, etc.
These costs can add up to significant sums, although it is important to remember that most of these items will only need to be purchased once. Although the cost of setting up their allotment just how they want it could run into hundreds of pounds, this will be a one-time expenditure for many growers, enabling them to enjoy years of growing at minimal future cost.
I’m not talking about “no dig”. I am no fan of Charles Dowding. I don’t dislike the man either, I just think he’s got a lot to answer for. Suddenly, there are legions of born-again no-diggers, roaming the streets and social media sites, waiting to pounce on some poor, unsuspecting allotmenteer and talk their hind legs off like members of some wacky religious cult. I’m too old and tired to involve myself with any of that.
I do like a nice raised bed though. Don’t get me wrong – I like a neat and orderly traditional allotment too. My neighbour’s allotment is stunning. But I have come to understand that I’m simply not capable of that. I do not have the time to invest. When I attempted it (for several years) I just ended up in a big mess. This was the result, and it was hideous.
In fact, it was far worse than that, but we don’t catalogue our failures, do we? I cringe when I look back.
I can’t always guarantee I’ll get up to the allotment every day. Some weeks I do. Last week I put in a five hour stint every single day – slogged my guts out too – but that is practically unheard of. With a four and a seven-year-old, we play a pretty consistent game of pass-the-parcel with bugs (one off one week, the other the next, then me getting sick) that can easily wipe out several weeks of any kind of meaningful work beyond a bit of watering and weeding. Even that isn’t possible on a daily basis. For me, raised beds are a must, although I can quite understand why other people prefer to do it the other way.
The year I installed my raised beds, I’d estimate it cost me somewhere in the region of £500. Yes, that is a ridiculous amount of money. I paid £15 for each pallet collar and bought seven, initially, restricted to one Facebook Marketplace seller in the local vicinity. The beds themselves came to £105, then there was Cuprinol paint (in Barleywood), damp coursing to line them with (I wanted to line them in long-lasting plastic to extend their lifespan), and a Stanley staplegun and staples (which I expected not to rust, but was unpleasantly surprised). Then there were rebars and blue plastic piping, weed membrane, netting, and an inordinate amount of woodchip and compost. I also invested in a wooden post/plastic mesh fence. The latter is completely ineffective at keeping pests out (particularly the two-legged kind pinching my strawberries), but does provide a visual barrier to keep the dog and children in.
I know. It’s a stupid amount of money. I’ve completely negated the argument about the cost effectiveness of allotmenteering. But I was in a hurry, and I just wanted it done. Two years later, I’ve just replaced the bark chipping paths for free, which has provided me with ten bags of free compost with which to fill my new raised beds. As luck would have it, the allotment now has a supply of free woodchip. The raised beds themselves are holding up fine, so hopefully this arrangement should last for some time.
You can achieve this, if not for free, then for an awful lot less than I paid. Timber and builders’ merchants often offer pallet collars for free. It pays to ask and ring around. Also, had I thought about it, I’d have done a longer distance run to one of those Marketplace or Gumtree sellers flogging pallet collars for a fiver and bought in bulk. But hey, hindsight is 20/20. There are often people giving wood, bark chippings and even compost away for free too. It’s a case of waiting and watching, but I was in too much of a hurry. I don’t regret it one bit though, because taking care of it has become a pleasure rather than a nightmare.
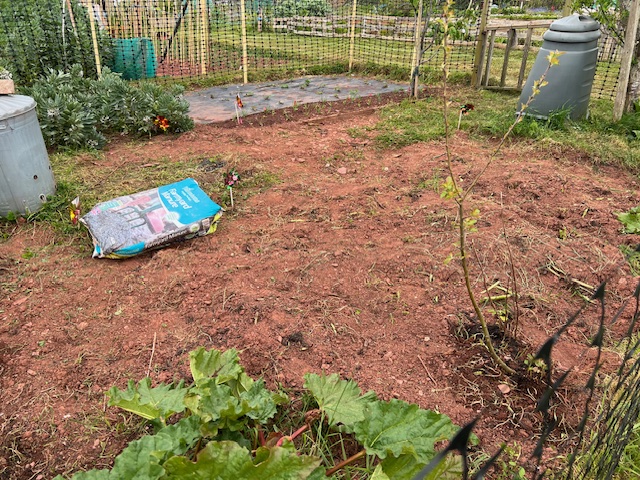
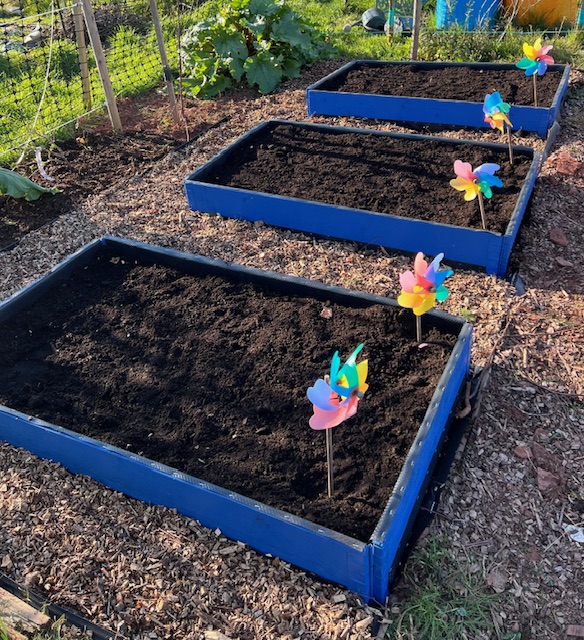
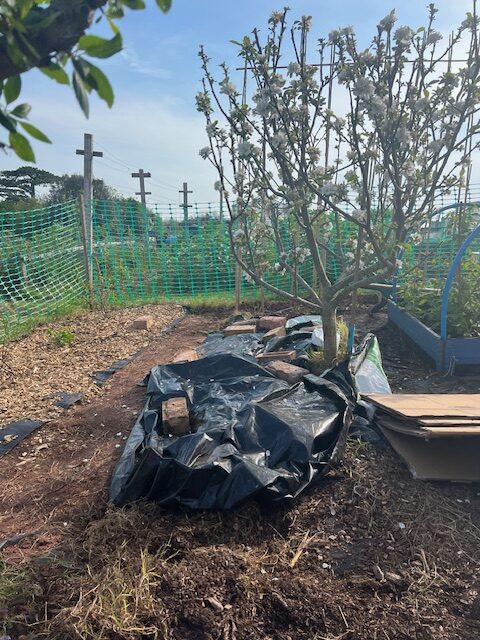
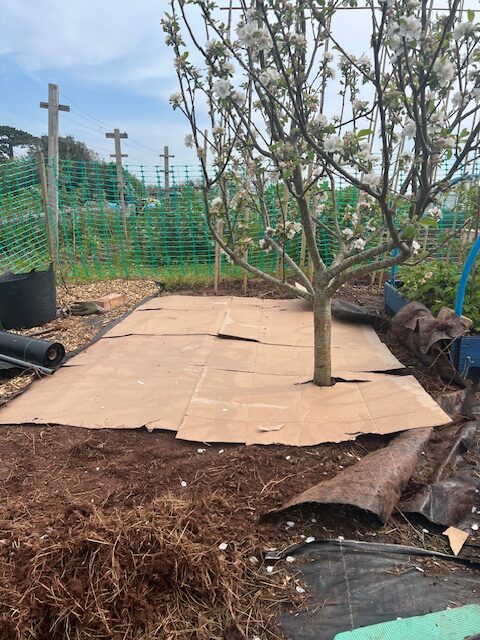
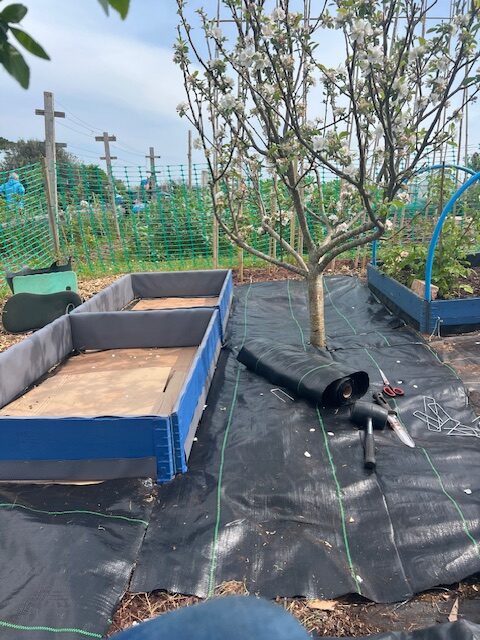
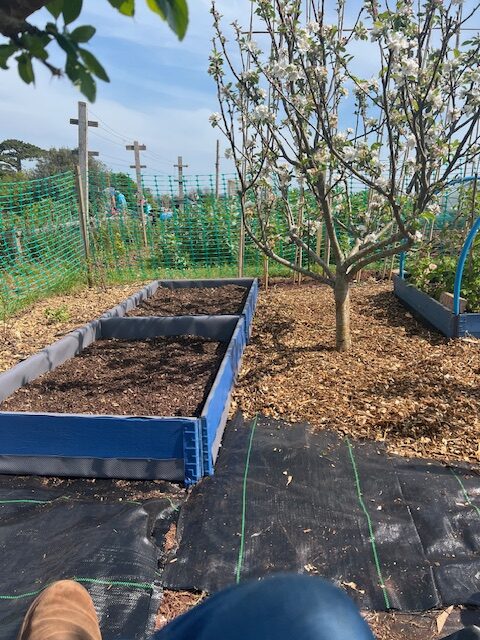
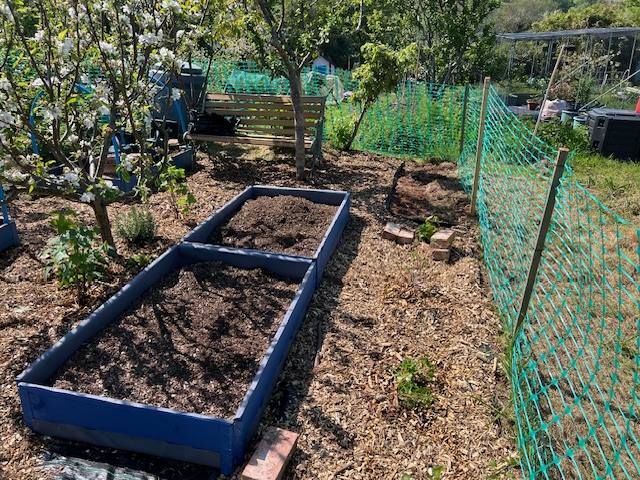
I’m just about to touch up the paintwork on my raised beds but they are still structurally sound. I’ve just installed two more. I had intended to have two rows of raspberries, but apparently they didn’t like the spot. Planted in bare earth, they never really thrived, instead sending out runners and reestablishing themselves in a raised bed! So, I’ve decided to listen to them – they obviously like it there. I’ve introduced some more bare root raspberries in the raised bed and relandscaped their original spot. After rotavating the space, I laid cardboard, membrane and woodchip, leaving room for two new raised beds, which I’ll be planting with peas and brassicas soon.
And for my next trick, I shall breathe new life in that poor, rusty old bench (which has served me well and hopefully will continue to do so).
This past week I’ve been trying to get my plot in order by replacing the woodchip paths. We laid these two years ago (cardboard, weed membrane, then a layer of bark chippings). On the whole, the paths have stood up well. Obviously, I don’t know about the cardboard underneath (or mind much), but the weed membrane looks like new (a long way from the disintegrating, murderous mess many allotmenteers warn about).
One lesson I’ve learned over the years is that not all weed membranes were created equal. This is one instance where it is worth investing in better quality materials. I have only had good experiences with it, but where poor quality membrane has been left and forgotten about, I can see how it would turn from a help to a major pain in the backside (membrane + rotavator = disaster).
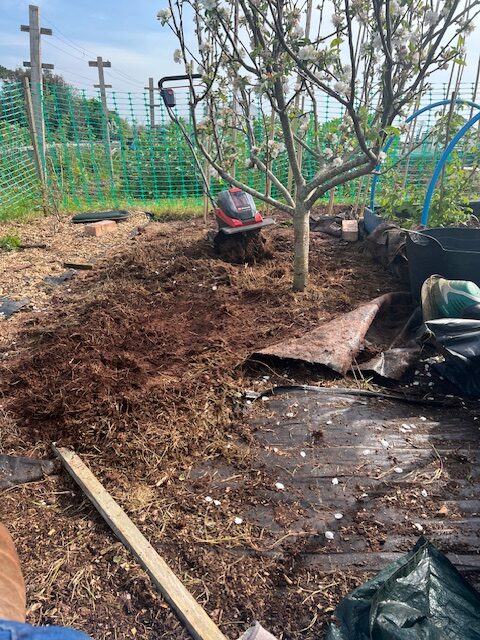
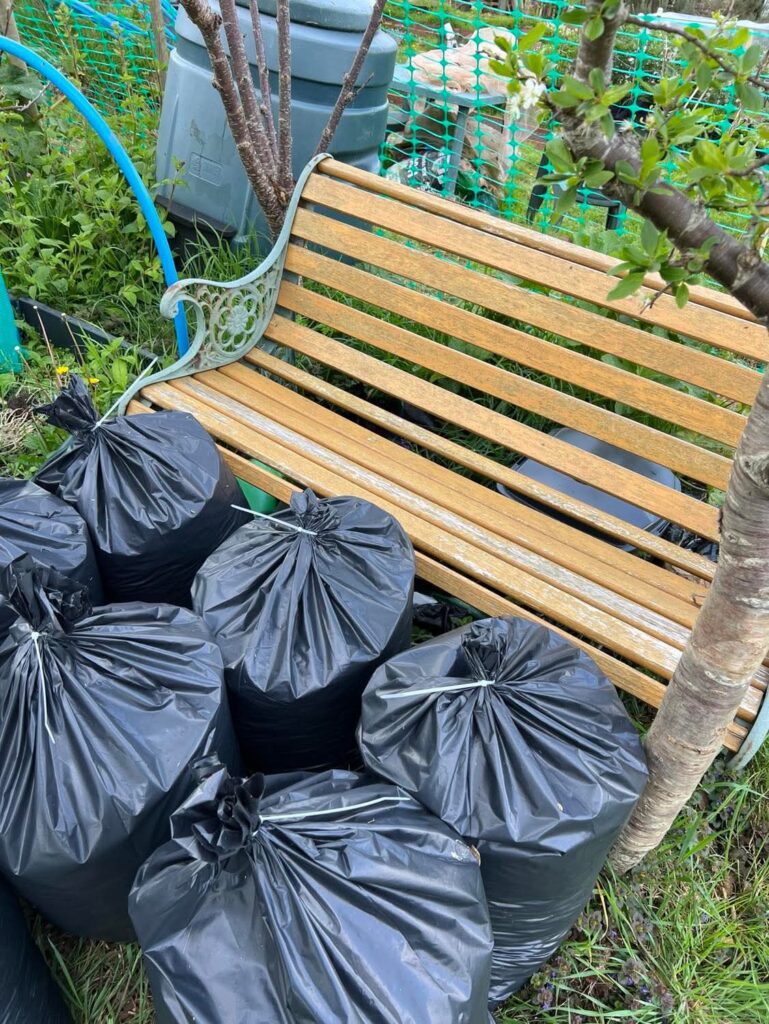
The membrane was fine, so I left it in situ. The woodchip, on the other hand, had degraded significantly. My paths were a mess. Weed seeds had set, their roots delving down, thriving on the layer of compost that had formed underneath. I must admit, I did neglect the paths over the winter (having gotten off scot-free the year before). The weeds had caught up with me.
I sat for hours with a riddle, weeding, scooping and sieving, throwing weeds in one bucket, intact woodchip in another, and retaining lovely free compost in a third. Having finally completed this laborious task, I have ten bags of good quality compost ready to go in my raised beds – enough for top ups and to create two new beds – and all for free!
Is anyone else finding buying compost a bit of a lottery these days? I know I should make my own, but I don’t. Having been terrorised by a vole(!), the thought of enticing rats with smelly food scraps is too much for me. Besides, I have a family of slow worms (great for hoovering up slugs, snails and other nasties) living in my compost bin and I don’t have the heart to disturb them. Although the compost is still fine from Trago Mills (the go-to for many Devon gardeners), I’ve found other shop bought compost to be awful, full of coir, balled up clay, plastic, and even glass.
Having spent several hours separating the wheat from the chaff, I also have a couple of sacks of woodchip to reuse. By a stroke of luck, the allotment recently acquired a free supply of bark chippings, meaning I can replace the paths without spending a small fortune (more money for seeds!). Best of all, I have my paths looking nice and tidy again, ready for the growing season ahead, and enough free compost to fill my two new raised beds.
Rich in insect life and micro-organisms, homemade compost is proven to be more beneficial to plant growth than commercially sold (this article from Compost Magazine delves deeper), so I’m hopeful my woodchip compost counts. And maybe, just maybe, I can create a continuous free supply by reusing the spent woodchip, but only time will tell.